Top Backpacking Tents of 2016

So you’re ready for some backpacking, and want to start with the basics.  Or maybe you’re experienced and looking for some new gear for that new trip you have lined up.  Having a top notch tent in your pack is one of the best ways to increase comfort, enjoyment and safety on backcountry trips.  But when you are starting to look for your new tent, you will find there are A LOT of options out there.  Trying to find the tent that fits your needs can quickly become overwhelming.

I’m kind of a gear-head.  I love my research.  And having thru-hiked the Appalachian Trail and many other trails, I have the opportunity of knowing THE BEST people to ask when it comes to gear selection.  Not only that, but during my own hiking experiences, I’ve researched and tested, got referred to many various backpacking tents, and narrowed them down to the very best of the best.  Weight, cost, interior space, and weather protection are all factors in my choices.

I hope this post helps you find the best tent to suit your needs, keeping you warm, dry and protected in the outdoors for many years to come!
IMG_4101Shwayzes Gear Guide: Tents.

Tent considerations

Cost – Cost is one of the biggest concerns for most people.  You shouldn’t have to pay a small fortune for a tent.  However, as most of you know, a little more money spent on a quality product protects you from various and unforseen setbacks encountered.  Preparation is key.

Weight – A few ounces here and there seem like nothing before the trip.  However, they add up and become consequential when you experience fatigue, knee pain, etc.  Keeping your pack light is the #1 priority to stay healthy on long trips.  I have seen too many injuries due to heavy packs in my time.  To me, weight is critical.  As one of the big 3 (heaviest items in your pack – tent, sleeping bag, sleeping pad), it’s essential to keep weight to a minimum with these items.

Protection – A backpacking tent that doesn’t protect you against mothernature is just dangerous.  I backpacked with a couple that bought a $40 tent, and when the temperature dropped, they suffered.  They also didn’t fair so well during rainstorms either.  Be careful with extreme budget tents.  Every tent on this list will keep you well protected from the elements.

Season Rating – Where are you hiking and how long?  What kind of conditions are you expecting.  Expect the unexpected.  3 season tents are the most popular, built for spring summer and fall trips.  I’ve survived some winter hiking with my 3 season, when it dropped down to 13 degrees at night with some wind.  I had a great sleeping bag, but that’s a different list.  A good 3 season tent will have you isolated from bad weather, while still promoting air circulation on those hotter days.

Interior Space – Comfort, really.  If you’re 6′ 3″ and your feet are touching against the end of the tent, you’re going to get wet.  Including your sleeping bag.  This is important to strike a balance between comfort and weight.  I have chosen tents that maximize interior space, while keeping weight at a minimum.  I like a spacious light weight tent, so I carry a 2p.  If you are willing to carry a little extra weight, consider bumping up a size.

Capacity – How many people will you be traveling with?  2 person tents are the most popular, and for good reason.  With recent tech designs and innovations, tent weight has been decreasing drastically, allowing a single person to carry a 2 person tent.  There is not much difference in weight between a 1p and 2p tent.  Group tents are heavier and less practical, and more meant for car camping.  However, there are some good options I have listed in another section.

Durability – Light weight tents tend to be less durable than heavy weight tents.  However, unless you are really rough with your gear, the tents I have provided in this list will last you many years, and thousands of miles.  My current tent has lasted around 3000 trail miles, and there is absolutely nothing wrong with it.  Flawless.  My experience and research have shown me that if you treat a light weight tent well enough, they will last you thousands of miles, many more miles than the average backpacker.  My professional opinion is to stick with the light weight tents.

Wall Construction – This gets a little too specific, but is important.  Double wall tents come with 2 separate walls, the tent itself, and a rainfly.  The advantage to this is that condensation will stay off the mesh inner wall, and stick to the rainfly.  The other advantage is simply airflow on a cloudless night.  Keep it on to stay warm, take it off when it is hot.  Single wall tents have a built in rainfly, saving a little weight, and promote airflow to keep condensation down.  However, condensation is inevitable, and when your sleeping bag gets soaked because of it, your next day is going to be rough.  My opinion is to stick with a double wall tent.

Doors/Vestibule Space – Having 2 doors is helpful when 2 people are sharing a tent.  As well as 2 vestibules.  A vestibule is the space under the rainfly, between the tent and the rainfly, that you can keep gear in to prevent from getting wet, but also don’t have to cram into your tent.  Vestibule space is very important to me.  The tents I have listed are proven to fit all your needs, and are quite spacious.

Set up – Freestanding tents have the ability to be pitched anywhere, pop up tents are a synonym.  They can be anchored down with stakes, and even into rock.  These are generally preferred due to ease of set up, and how quick they can be set up and broken down.  Non-freestanding tents use trekking poles or other methods to pop the tent up.  They save weight by not needing tent poles, instead using line, trekking poles, or stakes.  These are a little more time consuming, but I have met some hikers that absolutely love them.  The weight is a huge plus for these.  My preferred tent is a freestanding pop up tent.

Footprint – A footprint weighs next to nothing, and is what interferes with the ground touching the bottom of your tent.  It is extra weight, but will protect your tent from abrasions, rocks etc.  These are sometimes not included in tents, but are worth the purchase, and will be sold as an accessory to the tent.  I recommend footprints just due to how grimy the ground can get.

Buy Online – Although I prefer to buy online because I can shop around for the cheapest deal, not all do.  Check the sellers status before making a purchase, and ask about their return policy.  If you are unsatisfied with your purchase, simply return to the seller.  BUT, the advantage to this, is you are able to purchase the tent, and try it out on your own, before making the decision to keep it.  I’ve purchased my tents online, haven’t had problems and always have ended up keeping them.  But not before doing my diligent research.
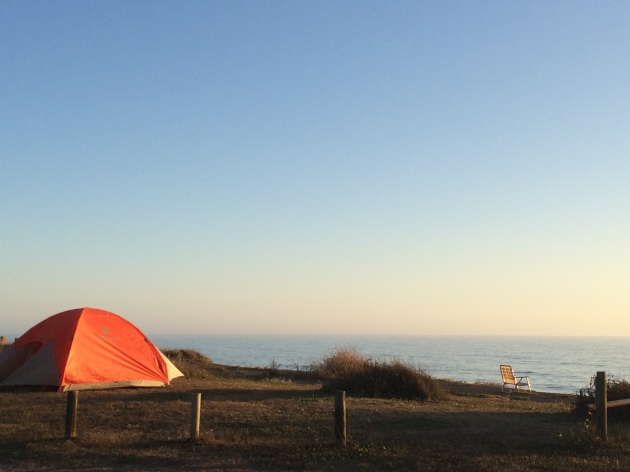
img_5805

Best Backpacking Tents of 2016

MSR Hubba Hubba Nx

Weight3 lb. 7 oz.

Dimensions:  84″x 50″ floor, 39″ height

Design:  2 person, 3 season, freestanding, 2 doors, 2 vestibules, double wall.

Features:  Set up and take down is made easier with a color coded hub and pole system.  Two large StayDry™ doors ensure water does not drip into tent while doors are open (I never tried this during a real rain storm).

Uses:  Ultralight backpacking, Backpacking, Camping

A very popular item among ultralight backpackers for a long time, this tent is partial to me, because I carried it with me as I thru-hiked the entire Appalachian Trail (2185.3 miles).  I STILL have it.  A rectangular floor and symmetrical shape allows hikers to spread out on opposite ends.  The vertical side walls and end walls help maximize the interior.  It is super easy to set up and take down, the vents help stay cool on hot nights, and the rain fly provides maximum protection against the elements.  Although it is a bit heavier than other tents I have listed, the durability, design and popularity puts it on this list.

Accessories:  I recommend picking up the MSR Hubba Hubba Nx footprint to increase durability.  The tent is available in different sizes, the Hubba Nx 1p, Motha Hubba Nx 3p, and the Papa Hubba Nx 4p.

Big Agnes Copper Spur UL2      

Weight:  2 lb. 13 oz.  Fast Fly Weight:  2 lb. 1 oz.

Dimensions:  Floor – 29 sq. ft. – 90″ x 52″/42″.  (Wider at head, narrower by feet).  Vestibule – 9 + 9 sq. ft.  Height – 42″.

Design: 2 person, 3 season, freestanding, 2 doors, 2 vestibules, double wall.

Features:  2 doors and 2 vestibules with 18 sq. ft. of vestibule space!  A crossover pole for extra headroom.  Double twisted thread for durability.  All seams are sealed with waterproof, solvent-free polyurethane tape.

Uses:  Long distance backpacking trips, ultralight backpacking, camping, section hiking, weekend warrior

The Big Agnes Copper Spur UL2 packs a solid punch for such light weight.  Although light in weight, it has double twisted thread for extra strength and durability.  Opposing mesh doors provide good ventilation, while allowing 2 people easy access to the tent.  A spacious accommodation for 1 person, but sleeps two in a pinch.  A good friend thru-hiked the Appalachian trail with this, and highly recommended this tent.  It has built in mesh pockets for your gear.

Accessories:  I recommend the Big Agnes Spur UL2 Footprint for extra durability.   This tent also comes in a 1 person UL1  (2 lb. 3 oz.), a 3 person UL3 (3 lb. 11 0z.), and the four person UL4.

Nemo Hornet 2p Tent               

Weight: 2 lb.

Dimensions: Floor – 28 sq. ft.  85″ x 51/43″ (Larger at head, than at foot).  Height – 40″.  Vestibule space – 8 sq ft. x 8 sq ft.

Design: 2 person, 3 season, freestanding, 2 doors, 2 vestibules, double wall.

Features:  Large side doors, a good amount of vestibule space, offers easy access in and out of tent.  Extremely fast and easy set up, thanks to single hubbed pole, with ball and socket tips.  Tech:  Durable, featherlite NFL aluminum poles weigh less than nearly all poles on market.

Uses:  Ultralight backpacking, Thru-hiking, Long distance hiking, Backpacking, Camping.

The Nemo Hornet 2p Tent is one of the lightest freestanding tents on the market.  This is due to the technology used in its design.  Light weight, yet still quite durable.  The downside is less headroom than some of the other tents, but the plus side is it is a lot lighter, making this one of the top tents on the market.  A couple more ounces than its 1p. version, but with an extra door and extra space, it is well worth the upgrade.

Accessories:  I recommend picking up the Nemo Hornet 2p Footprint for extra durability. This is also available in a smaller Nemo Hornet 1P tent.


ZPacks Duplex                  ultralight-two-person-tent-duplex-angle_l
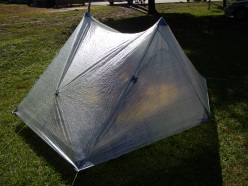
Weight:  1 lb. 5 oz.  (without poles)

Dimensions:  Floor – 90″ x 45″.  Height – 48″.  Vestibule space – 20.75″ on each side.

Design:  2 person, 3 season, 2 doors, 2 vestibules, single wall, 2 trekking poles and 6 stakes min. for setup.

Features:  Set up with two trekking poles to a peak height of 48″.  4 storm doors.  Tarp overhangs floor by 4-5 inches on each side to prevent water from dripping onto floor.

Uses:  Ultralight backpacking, long distance backpacking, backpacking, camping.

Fundy Footpath – Day 3

Looking to go on an adventure?  Get the gear first!

Visit my gear page here for questions about gear.

1313902.large

Goose Creek Campsite to Goose River – 7.4 km (4.6 miles)

*NOTE*  An additional 7.9 km (4.9 miles) is required to actually FINISH the trail and get to civilization.  This is the “mandatory approach trail”.  The hike from Goose River to find the approach trail is NOT explained well in the guide, and I recommend reading the bottom for help with navigation. 

Total Day 3 – 15.3 km (9.5 miles)

Total hiked after completion – 49.3 km (30.6 miles) TOTAL.

We made the 9.5 miles by 1 pm, crushing the day, because.. HUNGER!!!  All we could think of was, oh man – the car is right there!  9 miles away.  We can potentially get there at noon and immediately drive to eat the most food ever.  Warm showers were also on the mind.  But first, food.

We had a tough decision to make.  Low tide was scheduled for 6:51 am, we had 2 crossings to make that were 7.4 km apart, with a 4 hour window to make both.  Knowing our previous days hiking rate, and our current exhaustion level, it wasn’t looking good.  However, we had hunger on our side.  I was not about to wait until 5 pm to cross Goose River.  We were up at 5 am, and out of camp by just before 6 am.

img_7220

Crossing Goose Creek sucks.  Neither of us had water shoes, because, who has time for those.  They are too heavy for camp shoes, and I have never really needed them.  I’ve made all my river crossings to date in my boots.  THIS crossing, however, was not sandal friendly.  I immediately lost my first sandal hiking the .5 km up river to the crossing.  The mud came up to our knees.  I didn’t even bother looking for it, I was too tired.  The mosquitos were on us, the rain had started, I was barefoot, and it was only 6 am.


We made it to the crossing, a slow trickle of shallow water.  The rocks were cutting into my feet, I was ready to put on some shoes and get my hike on!  The crossing took about 20 minutes for the minimal distance, which was a little disappointing.

On the other side, however, we went beast mode.  I carry mio energy whenever I hike, which came in handy.  The hike from Goose Creek to Goose River is super easy, comparatively.

We hiked up and over to Azore Beach, it was raining, but it was still a pretty site.

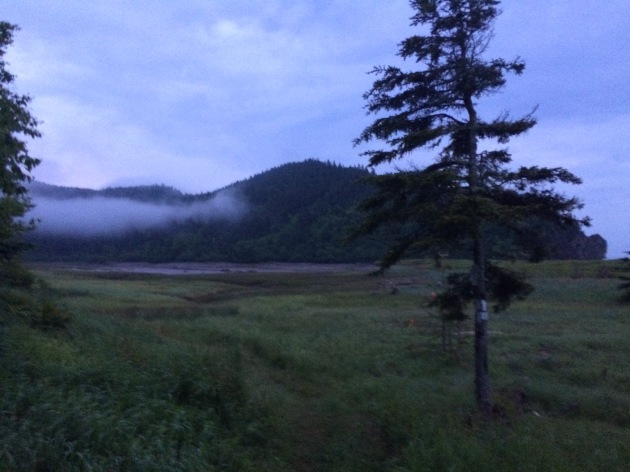
We got a little worried that we weren’t going to be able to make the crossing, until we came upon 2 hikers that had just crossed it, and said the water was still below their knees.  We ran from there.  We found the river!   We found the 0 km!  It was 3 hours past low tide and the crossing was super easy.  Rock hopping.  Never got wet.  What was all this about in the book then?

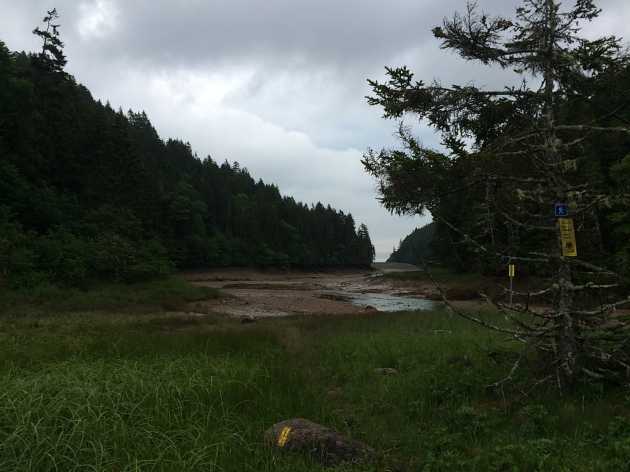
  • NOTE – Well, that’s when things got tricky.  We had to find the approach trail.  We saw some yellow blazes, assumed we were going the right way and walked for a couple hundred yards until it just ended.  We ended up in deep ocean channel, that was just void of water.  There was water in the center, with sloping hills on either side filled with mud, and a high tide water mark well above our heads 20-30 feet on either sides of us.  We realized it was 3 hours past low tide, with the safe crossing gone 1 hour ago, and started to get worried.  With no more blazes visible, panick set in a little bit.

img_7226

This is pretty much the end of the blazes.  Up ahead, it diverges left and straight.  There are footprints and paths going both ways.  The correct sequence from here is to hike straight, try to keep out of the mud, and once you get to the divergence, go straight across, up the hill, and on top of that hill you will see a log bench and some rocks.  Look very carefully and you will find a poorly marked entrance to the beginning of the approach trail.  The ONLY reason we found this, was because we saw a person.  We had walked around for a good 10 minutes in the wrong direction, and then turned around to try to find our bearings again.  This is not good to do when high tide is looming.  Hope that helps!

This section is beautiful!!!  And only 7.9 km from our car!!!  Did I mention I was hungry?  What did hot food taste like?  Is there lobster in New Brunsick?  How fast can an injured person run 5 miles with a 40 lb pack?  These are all questions in my mind as I surveyed the awesome scenery.

After taking 30 minutes to find the actual damn trail, we started on it.  IT WAS A ROAD!  We hiked the 5 miles in a little under 2 hours.

The End.  Aaaaand ready for the next one.


Thru-hike Gear List

1313902.large Camping and the Outdoors

My 2014 Appalachian Trail Gear List.  This is also a good way for all of you 2016’ers to double check that you have everything!  I have successfully hiked the entire Appalachian Trail in 152 days!!!  I won’t say I know everything there is to know about gear, but I can say this.  What I had, worked for me, and I finished.  That, in itself, should say a lot.

EDIT – Pack Base weight – 20.2 lbs.  This will change by the end of the week.

Base weight packed bag (no food,water) 20.2 lbs

Unpacked bag (no food)

Packed bag (no food,water) base weight - 20.2 lbs.

Packed bag (no food,water) base weight – 20.2 lbs.

Tent/pack/sleep

Backpack + Raincover
-I used the ULA Circuit 2.2 lbs, however I ended up switching to this

Osprey Exos 58 at 2.7 pounds, it’s still lightweight, and can fit A LOT more in it.

Raincover  Osprey Ultralight Raincover
3.7 oz (seriously ultralight)

Tent and groundclothMSR HUBBA 1P Tent2 lb 7 oz, down to 1 lb. 10 oz.  This lasted me the entire trip, I AM IN LOVE WITH THIS TENT!

MSR Hubba Footprint (for under tent)7 oz.

Sleeping bag (winter)Western Mountaineering Sycamore$480 – expensive is worth is when you are camping in the cold!  I hiked in 2.5 ft of snow, and the temps hit downwards of 13 degrees.  (25*) Regular – 2 lbs w/ stuff sack

Sleeping bag linerSea To Summit Thermolite Reactor Plus  $65.  (adds 20* warmth) 9.3 oz

 Sleeping PadThermarest NeoAir Xlite (Large) 12 0z.  (Lightest for long trips, mine lasted the entire AT).  One of the most important items for a good night sleep outside of your tent and sleeping bag.  If you can save a pound with some new technology, it’s worth the extra money in my book.  At $160, this is a little more expensive than most sleep pads, but weighing in at 12 oz, it gets my vote.  *Note – Had a small leak in pad by Massachusetts (1500 miles into the hike), returned to REI for brand new one, no questions asked.

What I’m wearing

Shoes + InsolesSaloman Xa 3d Pro Ultra II Trail Running Shoes  /Insoles –Superfeet Green 1.76 lbs (both trail runners and insoles)  Now that is light.  Superfeet saved my life, and I believe I hiked the entire trail because of them.  They are worth checking out.  They have a couple options, but Green are the toughest.

Socks – Darn Tough  3 0z.   Best socks with life time warranty.  Get them.

UnderwearExofficio give and go mesh briefsPrevent the chafe.  You will thank me later.  Exofficio are THE BEST underwear to hike in.  I started off with regular briefs and barely survived.  I switched to these and they were a life changer.

SS Shirt – Patagonia Mens Merino Silkweight T-shirt 4.8 oz.

LS Shirt – Smartwool Midweight Zip Top 8 oz.

ShortsNylon running shorts 3.8 oz.

Trekking poles – Black Diamond Alpine Carbon Cork 1 lb 2 oz. I cannot stress this enough, trekking poles will save your knees and joints on long distance hikes.  This specific type of trekking poles were the MOST popular on the trail, as they left no blisters on your hands.  The price is worth it.  Black diamond is a great company.

Wallet – small ziploc bag will hold wallet/phone/headphones – will replace as needed

Watch – High Gear Alti-Xt (records temp/altitude among other things I don’t need)  🙂 Overall just looks awesome.

Bandana – 1 oz.

Clothing

Stuff sack8 L Sea to Summit stuff sack 2 0z.

Cold weather jacket/pillowPatagonia New Nano Puff Hooded Jacket12.6 oz.  Yes, this doubled as my pillow during the night while inside a stuff sack.  All you need.

Underwear – extra pair (1)

Long UnderwearIcebreaker Mens Long Underwear7 0z.  Necessary if traveling in cold.  (It hit 13 at night on the Appalachian Trail, and some days were below freezing as well)

Short Sleeve Shirt – polyester T shirt for camp – 4 oz.

GlovesSmartwool Liner Gloves2.3 oz.

Socks – 2 pairs Darn Tough 6 oz.

Rain JacketPatagonia Mens Torrentshell Jacket14 oz.  Used for an entire 5 months on trail, kept me dry 🙂

Eating and Drinking

Water containers – 1 L water bottle and Osprey Hydraulics 2Liter Resevoir11.2 oz.

Water TreatmentAquamira drops 1 oz.

StoveJetboil Minimo14.6 oz – comes with it’s own pot.

Pot – I recently switched over to the Jetboil Minimo It has not disappointed!  It cooks meals quicker than the snowpeak, and comes with it’s own pot.

Bear line50 ft paracord 4 oz.

Spork – .64 oz.

Miscellaneous

Bag liner – Compactor trash bag 2 oz.

Duct Tape + lighters – 2 oz.

HeadlampBlack Diamond Storm Headlamp3.9 oz.  (I night hiked A LOT)

Camera + chargerNikon Coolpix AW120Waterproof, shockproof, Appalachian Trail proof – 9 oz.

Cell phone/charger/case/battery – Iphone 5s / New Trent (USB capable, charges 2-3 times they say)

Anker Dual USB Charger – Can charge 2 items simultaneously with 1 wall plug in.  (Handy for the phone/kindle, as well as when other people need to share the same outlet)

Glasses + case – Glasses/case/contacts/solution 6 oz.  I will be bringing contacts as well as glasses.

Hygiene – (toothbrush/paste/floss/nail clippers/soap (Dr Bronners peppermint)/germ-x)

Towel – bandana 1 0z.

First aid – (alcohol swabs/ibuprophen (lots)/benadryl/duct tape/bandaids/gauze/tweezers/safety pins) *Thanks Redditors!

Trail Guide/JournalAWOL 2014 NOBO Guide 8 oz.

Kindle– 10.5 oz.(I read countless books on the Appalachian Trail, I use the kindle on every trip.  Worth the less than a lb. of weight in my opinion)

KnifeSmith & Wesson extreme ops knife   3.2 oz.

Body Glide Anti Chafe – 1.5 oz.

Gear

1313902.large Camping and the Outdoors


A brief summary of the gear I took with me.  This is also a good way for you guys to double check that you have everything!  I have successfully hiked the entire Appalachian Trail in 152 days!!!  I won’t say I know everything there is to know about gear, but I can say this.  What I had, worked for me, and I finished.  That, in itself, should say a lot.

EDIT – Pack Base weight – 20.2 lbs.  This will change by the end of the week.

Base weight packed bag (no food,water) 20.2 lbs

Unpacked bag (no food)

Packed bag (no food,water) base weight - 20.2 lbs.

Packed bag (no food,water) base weight – 20.2 lbs.

Tent/pack/sleep

Backpack + Raincover
-I used the ULA Circuit 2.2 lbs, however I ended up switching to this

Osprey Exos 58 at 2.7 pounds, it’s still lightweight, and can fit A LOT more in it.

Raincover  Osprey Ultralight Raincover
3.7 oz (seriously ultralight)

Tent and groundclothMSR HUBBA 1P Tent2 lb 7 oz, down to 1 lb. 10 oz.  This lasted me the entire trip, I AM IN LOVE WITH THIS TENT!

MSR Hubba Footprint (for under tent)7 oz.

Sleeping bag (winter)Western Mountaineering Sycamore$480 – expensive is worth is when you are camping in the cold!  I hiked in 2.5 ft of snow, and the temps hit downwards of 13 degrees.  (25*) Regular – 2 lbs w/ stuff sack

Sleeping bag linerSea To Summit Thermolite Reactor Plus  $65.  (adds 20* warmth) 9.3 oz

PadThermarest NeoAir Xlite (regular) 12 0z. (Lightest for long trips, mine lasted the entire AT)

What I’m wearing

Shoes + InsolesSaloman Xa 3d Pro Ultra II Trail Running Shoes  /Insoles –Superfeet Green 1.76 lbs (both trail runners and insoles)  Now that is light.  Superfeet saved my life, and I believe I hiked the entire trail because of them.  They are worth checking out.  They have a couple options, but Green are the toughest.

Socks – Darn Tough  3 0z.   Best socks with life time warranty.  Get them.

UnderwearExofficio give and go mesh briefsPrevent the chafe.  You will thank me later.  Exofficio are THE BEST underwear to hike in.  I started off with regular briefs and barely survived.  I switched to these and they were a life changer.

SS Shirt – Patagonia Mens Merino Silkweight T-shirt 4.8 oz.

LS Shirt – Smartwool Midweight Zip Top 8 oz.

ShortsNylon running shorts 3.8 oz.

Trekking poles – Black Diamond Alpine Carbon Cork 1 lb 2 oz. I cannot stress this enough, trekking poles will save your knees and joints on long distance hikes.  This specific type of trekking poles were the MOST popular on the trail, as they left no blisters on your hands.  The price is worth it.  Black diamond is a great company.

Wallet – small ziploc bag will hold wallet/phone/headphones – will replace as needed

Watch – High Gear Alti-Xt (records temp/altitude among other things I don’t need)  🙂 Overall just looks awesome.

Bandana – 1 oz.

Clothing

Stuff sack8 L Sea to Summit stuff sack 2 0z.

Cold weather jacket/pillowPatagonia Nano Puff Hooded Jacket 12.6 oz.

Underwear – extra pair (1)

Long UnderwearIcebreaker 7 0z.

Short Sleeve Shirt – polyester T shirt for camp – 4 oz.

Gloves Smartwool liner gloves 2.3 oz.

Socks – 2 pairs Darn Tough 6 oz.

Rain JacketPatagonia Torrentshell Waterproof Rain Jacket 14 oz.

Eating and Drinking

Water containers – 1 L water bottle and 3 L Osprey Hydraulics bladder 10.9 oz.

Water TreatmentAquamira drops 1 oz.

StoveSnow Peak GigaPower 3.75 oz.

PotSnowPeak Titanium Trek 900 Cook Set (pot 30 oz. lid 8 oz.) 6.2 oz.

Bear line50 ft paracord 4 oz.

Spork – .64 oz.

Miscellaneous

Bag liner – Compactor trash bag 2 oz.

Duct Tape + lighters – 2 oz.

HeadlampBlack Diamond Storm 3.9 oz.

Camera + chargerNikon Coolpix AW110 9 oz.

Cell phone/charger/case/battery – Iphone 5s / New Trent (USB capable, charges 2-3 times they say)

Anker Dual USB Charger – Can charge 2 items simultaneously with 1 wall plug in.  (Handy for the phone/kindle, as well as when other people need to share the same outlet)

Glasses + case – Glasses/case/contacts/solution 6 oz.  I will be bringing contacts as well as glasses.

Hygiene – (toothbrush/paste/floss/nail clippers/soap (Dr Bronners peppermint)/germ-x)

Towel – bandana 1 0z.

First aid – (alcohol swabs/ibuprophen (lots)/benadryl/duct tape/bandaids/gauze/tweezers/safety pins) *Thanks Redditors!

Trail Guide/JournalAWOL 2014 NOBO Guide 8 oz.

Kindle– 10.5 oz.(I read countless books on the Appalachian Trail, I use the kindle on every trip.  Worth the less than a lb. of weight in my opinion)

KnifeSmith & Wesson extreme ops knife   3.2 oz.

Body Glide Anti Chafe – 1.5 oz.